
Quick Answer: A metal roof installation usually takes 2–4 days and includes removing the old roofing, preparing the deck, laying the underlayment, and fastening the metal panels. The process requires skilled roofing professionals to safeguard your home and preserve your warranty coverage. |
Meta roofing installation is more than a home improvement project. It is a structural upgrade that can protect your property for 40–70 years, improve energy efficiency, and enhance curb appeal.
Without proper preparation, even the highest-quality panels can underperform. Delays, installation errors, and unexpected costs often occur when homeowners overlook critical pre-installation steps such as structural inspections, site readiness, and material planning.
This guide explains how to prepare your home for metal roof installation by inspecting your roof, protecting your property, and coordinating with contractors to ensure lasting performance.

Thorough planning ensures your roofing project starts with accurate data and clear expectations. This stage eliminates surprises and lays the groundwork for a smooth installation.
Accurate evaluation and measurements are essential for a successful metal roofing installation. Contractors assess the roof’s size, pitch, slope, and architectural features such as valleys, hips, dormers, skylights, and chimneys, as these details guide panel layout and cutting requirements.
Measurements are taken to determine the total square footage of the roof, with an additional 10–15% factored in to account for material waste, overlaps, and trimming. This calculation ensures there is enough material for complete coverage without delays caused by shortages.
The team also reviews access points, identifies potential obstacles, and addresses safety considerations for working at height. Planning includes checking building codes, HOA rules, and permit requirements to avoid delays.
Before installing a new metal roof, the existing roofing system must be evaluated to identify any issues that could compromise the project. This inspection checks for damaged shingles, cracked tiles, or rusted metal that may indicate underlying structural problems. The roof deck is examined for sagging areas, water stains, or soft spots that suggest rot.
Ventilation systems are also reviewed to determine if they meet current standards for airflow and moisture control. Any blocked or damaged vents are noted for repair or replacement. Flashing, gutters, and fascia boards are inspected to ensure they are in good condition or flagged for replacement during the installation.
The choice of metal roofing material impacts performance, aesthetics, and durability. Options include standing seam panels for a modern look, corrugated panels for a rustic style, and metal shingles for a traditional profile. Each of them has its own fastening methods, maintenance needs, and costs.
Climate and architectural style guide material selection. In hot climates, reflective coatings can improve energy efficiency, while coastal areas may require corrosion-resistant metals like aluminum or zinc. Color choices should balance aesthetic goals with heat-reflective properties to lower cooling costs.
During planning, the contractor calculates exact material needs, schedules delivery, and coordinates installation timelines. For new construction, this phase includes coordinating with other trades to avoid delays.
Seasonal conditions influence installation speed, safety, and overall quality. Spring and fall often provide the best balance of moderate temperatures and low precipitation, which allows adhesives, sealants, and underlayment to perform optimally.
In summer, high heat can affect both workers and materials, potentially causing premature curing of sealants. Winter installations in cold climates may require specialized equipment to manage ice and snow, and can extend the project timeline.
Check the weather forecast for the days leading up to and during the installation period. Even brief storms can delay work and expose your home to water intrusion if the roof deck is uncovered. If inclement weather is likely, coordinate with your contractor to adjust the schedule.
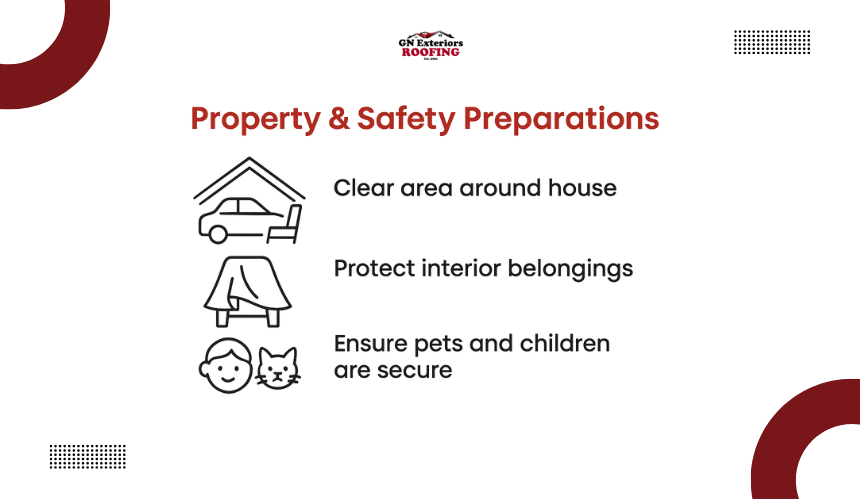
Preparing your home and ensuring safety protocols are in place protects both your property and everyone involved in the project. These steps keep the workspace efficient and hazard-free.
A clear, accessible work area allows the roofing crew to operate efficiently and safely. Move vehicles from driveways and garages to keep them out of the debris zone. Relocate patio furniture, grills, planters, and other outdoor items to a protected location.
Trim overhanging branches to prevent interference with equipment and to reduce the risk of damage to the new roof during installation. Remove lawn ornaments, garden tools, and any loose items that could obstruct foot traffic or pose a hazard.
Ensure there is a direct path from the street to the house for material transport, and unlock gates or fences so the crew can access all sides of the property without delay.
Roof installation work can create vibrations, dust, and noise inside the home. Breakable items should be removed from walls and shelves, and furniture and electronics should be covered with protective sheets.
If possible, relocate pets and plan for noise disruptions, especially for those working from home or with young children. These steps prevent damage to personal belongings and make the installation period more comfortable.
Safety preparation protects both the crew and the household. Follow these five safety measures for a stress-free and smooth metal roof installation:
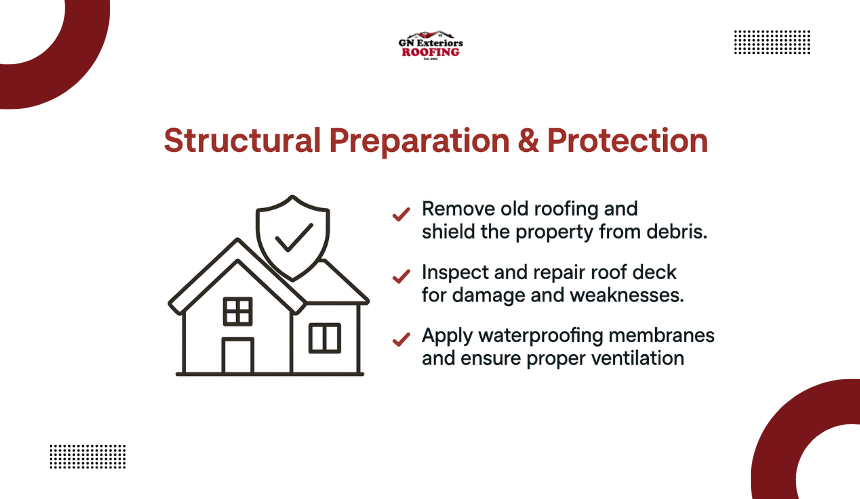
Strengthening and safeguarding the roof’s structure before installation guarantees long-term performance. This stage creates a secure base for your new metal roofing system.
The tear-off process involves removing all existing roofing layers to expose the deck. Contractors place tarps around the home to catch falling debris and set up protective coverings over landscaping, driveways, and outdoor furniture.
Heavy-duty dumpsters are positioned for efficient waste disposal, and recyclable materials such as aluminum are separated from general waste.
Careful tear-off prevents damage to siding, windows, and landscaping. Professional crews follow strict safety protocols, including using harnesses, gloves, and protective eyewear during removal. Once the old roofing is cleared, the deck is ready for inspection and repair.
The roof deck serves as the base for the metal panels, so it must be completely sound. Contractors check for rot, water damage, uneven surfaces, protruding nails, and loose boards.
Damaged sections are replaced with new plywood or OSB boards of matching thickness, and all loose boards are securely fastened to the rafters.
A level, solid deck prevents panel warping, ensures proper fastening, and increases the overall lifespan of the roofing system.
To guard against water infiltration, drip edges are installed along eaves and rakes, directing runoff away from the fascia. Ice and water shields are applied in valleys and around roof penetrations such as vents and chimneys to create watertight seals in high-risk areas.
These layers provide critical protection against leaks, especially in regions with heavy rainfall or snow, and help preserve the integrity of the roof structure over time.
Proper ventilation prevents moisture buildup and regulates attic temperature, both of which extend the life of a metal roof. Contractors clear blocked soffit vents and install ridge vents along the roof peak for continuous airflow.
Balanced ventilation protects against mold growth, wood rot, and excessive heat that can damage roofing materials and reduce energy efficiency.
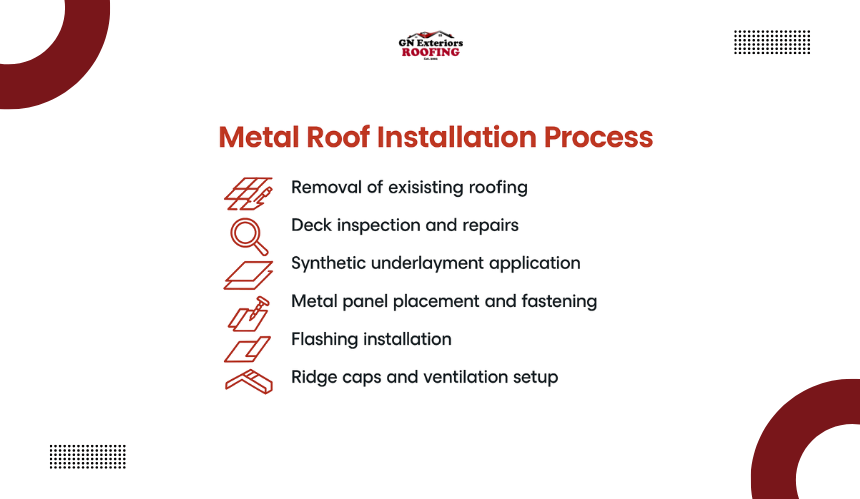
A metal roof installation follows a precise sequence to ensure durability, weather resistance, and warranty compliance. The process of meta roof installation is explained below:

Once the installation is complete, the contractor inspects the roof for proper panel alignment, secure fasteners, and sealed flashing. Ventilation components are checked for correct installation, and all debris is cleared from the property.
A detailed inspection report may be provided, documenting that the installation meets manufacturer guidelines and is eligible for warranty coverage.
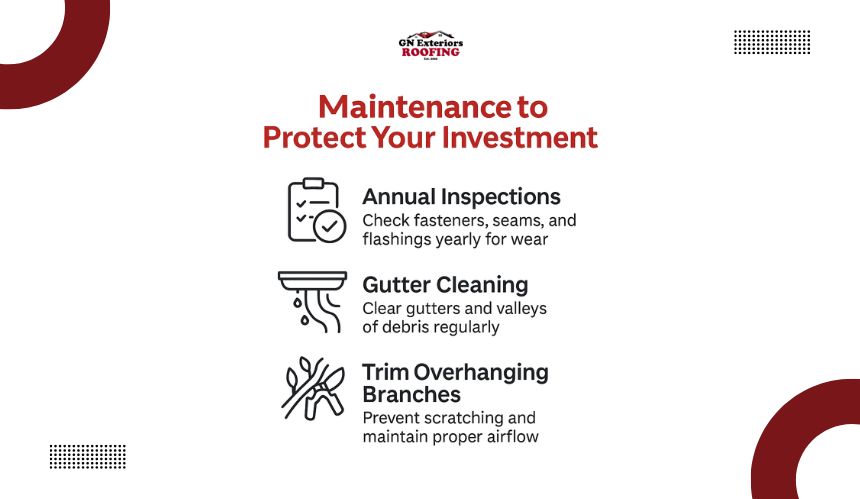
Annual roof inspections help identify issues early. Check fasteners, seams, and flashings for signs of wear, and clear gutters and valleys of leaves and debris. Trim overhanging branches to prevent scratching and maintain airflow.
Following these maintenance steps preserves the roof’s appearance, ensures peak performance, and keeps warranty protection intact.
Enhance home protection and curb appeal with expert metal roofing services from GN Exteriors. Reach out today to schedule a professional consultation and inspection.
In some cases, metal panels can be installed over a single layer of asphalt shingles if the structure is sound and local building codes allow it. A professional inspection is necessary to ensure the deck can support the added weight and meet warranty requirements.
Yes, metal roofing often boosts resale value due to its longevity, energy efficiency, and low maintenance needs. Buyers value the long-term savings and weather resistance it provides.
No, most modern metal roofs have reflective coatings that deflect solar heat, helping to reduce cooling costs. In fact, they can be more energy-efficient than many traditional roofing materials.
When installed with proper underlayment and insulation, metal roofs are no louder than other roofing materials. Noise reduction is largely achieved through correct installation techniques.
