

To spot and fix a roof leak, you must first identify visible signs of water intrusion, such as ceiling stains, attic moisture, or warped shingles. Then, locate the exact breach in the roofing system before applying the correct repair method, such as shingle replacement or flashing reseal.
A roof leak begins when water penetrates through a compromised section of the roofing envelope, often due to aging shingles, cracked flashing, failed underlayment, or damage from wind and hail.
What makes leaks problematic is that water often travels along joists or rafters before becoming visible, making it difficult to trace the leak back to its origin. Even minor leaks can saturate insulation, corrode electrical systems, and promote mold growth inside the attic or ceiling cavity.
This guide provides a highly specific, step-by-step approach to leak detection and repair. You will learn how to pinpoint common leak sources, assess the severity of damage, and apply both temporary containment measures and permanent repairs.
The most reliable way to spot a roof leak is to look for physical indicators of moisture intrusion, such as ceiling discoloration, attic water trails, bubbling drywall, or damp insulation, especially after rainfall.
These symptoms typically appear near the leak’s exit point, not necessarily its origin, so identifying them early allows you to begin tracing the source before the damage spreads.
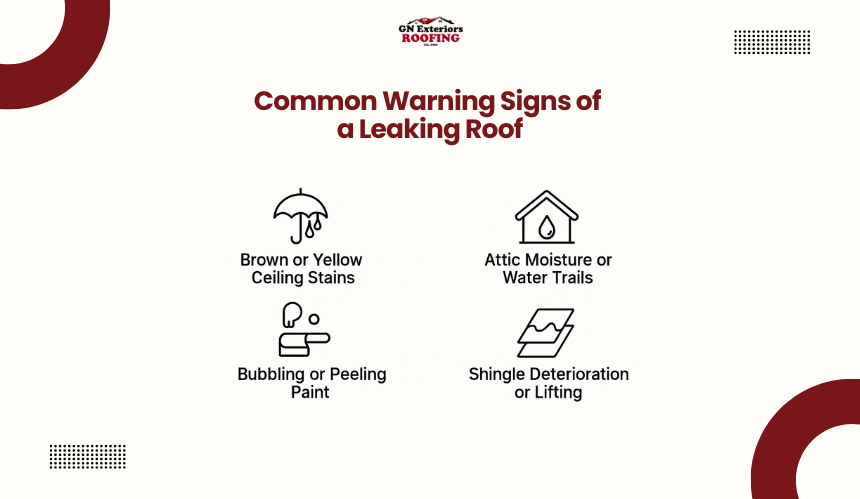
Here are the most specific and common red flags to spot a leaky roof:
Circular or irregular brown stains on your interior ceiling are classic indicators of a roof leak. These stains often appear near lighting fixtures or HVAC vents and may darken after heavy rain. The moisture causing these stains usually enters the attic through missing or damaged shingles and saturates the ceiling drywall below.
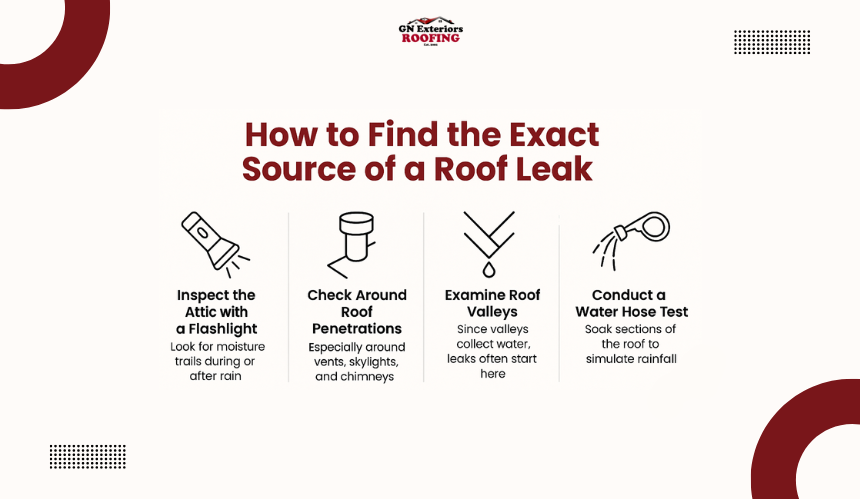
To find the exact source of a roof leak, start by inspecting the attic for moisture trails during or immediately after rain. Then, trace the water path uphill toward penetrations like vents or skylights, where leaks most commonly begin.
Water rarely enters directly above the visible stain; it follows structural components like rafters or decking before reaching your ceiling.
Use the following six proven methods to pinpoint the true entry point:
Enter the attic with a high-lumen flashlight while it’s raining or shortly afterward. Look for fresh moisture on rafters, plywood decking, or insulation. Shine the light along trusses and roof sheathing to detect glistening surfaces or darkened wood.
Pro Tip: Follow water trails uphill, their origin is typically above or to the side of where water exits indoors.
Over 80% of roof leaks occur around penetration points, including:
Carefully examine these areas for damaged flashing, deteriorated caulking, shrunken rubber boots, or gaps between metal seams. These failures allow rainwater to bypass the water-shedding layer and enter the structure.
If the leak isn’t visible during inspection, simulate rainfall by using a garden hose:
This isolation technique helps determine which roof section or component is compromised, especially useful for identifying intermittent leaks.
In complex cases or for flat roofs, roofing professionals may use:
Roof leaks usually start with something small, a lifted shingle, a cracked flashing seam, but that small issue can quickly turn into ceiling stains, ruined insulation, or even mold in your attic. Understanding why your roof is leaking is the first step toward fixing it for good.
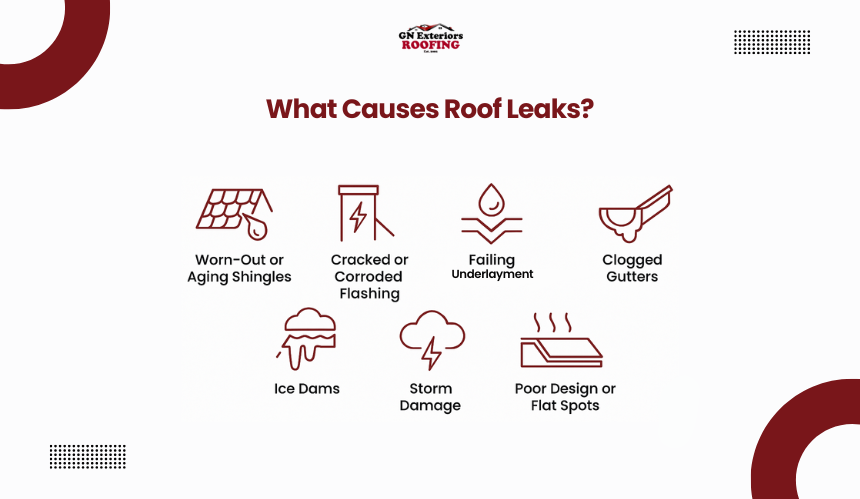
Let’s break down the seven most common causes and what to look out for:
If your roof is more than 20 years old, chances are your shingles are past their prime. The granules that protect them may have worn off, making the surface brittle and vulnerable. Cracked, curled, or missing shingles are a clear sign that water can easily make its way through.
Flashing is the thin metal that seals the edges around chimneys, skylights, vents, and other roof penetrations. If it was installed wrong, has rusted out, or the sealant has dried up, rain can slip right past it.
Beneath your shingles is a hidden layer that acts as your last line of defense: the underlayment. If it’s torn, degraded by years of heat, or wasn’t installed properly, water will find its way through, especially during wind-driven rain.
Your gutters are supposed to carry water away from your roof, not back under the shingles. But when they’re clogged with leaves or debris, water pools and can force its way under the edge of your roof, damaging fascia, soffits, and interior ceilings.
If you live in a cold climate, ice dams are a silent roof killer. They form when warm air in your attic melts snow on the roof, which then refreezes at the edge. Water gets trapped and starts backing up under your shingles, right into your home.
Strong winds and hail can peel shingles up, dent flashing, or knock debris onto your roof, all of which can punch a hole in your roof’s armor. Sometimes the damage isn’t obvious until the next rainfall.
Some roofs just were not built with water in mind. Low-slope areas, complex roof shapes, and valleys can all trap water if they are not flashed or sealed properly. Water that sits too long eventually finds a way in.
To fix a roof leak, start by identifying the exact source, remove or seal the compromised material, and restore the roofing layers using appropriate materials like replacement shingles, flashing, or waterproof underlayment, depending on the severity of the leak.
Whether you’re dealing with a minor drip or widespread water damage, acting quickly is what prevents a manageable repair from turning into a full roof replacement.
Here’s exactly what to do:
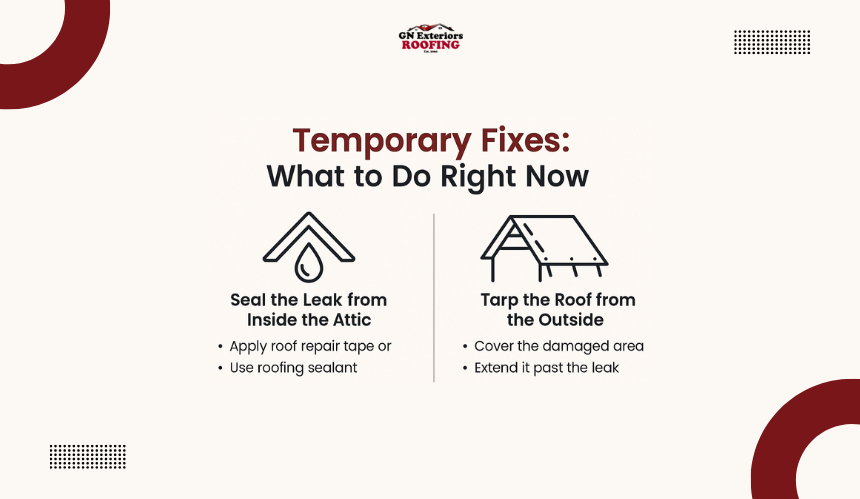
Find the wet spot on the underside of the roof sheathing. Dry it off, then:
Note: This only stops water temporarily. You’ll need to address the issue from the exterior soon.
If shingles are missing or the damage is visible:
This buys you time and protects the interior while you prepare for permanent repairs.
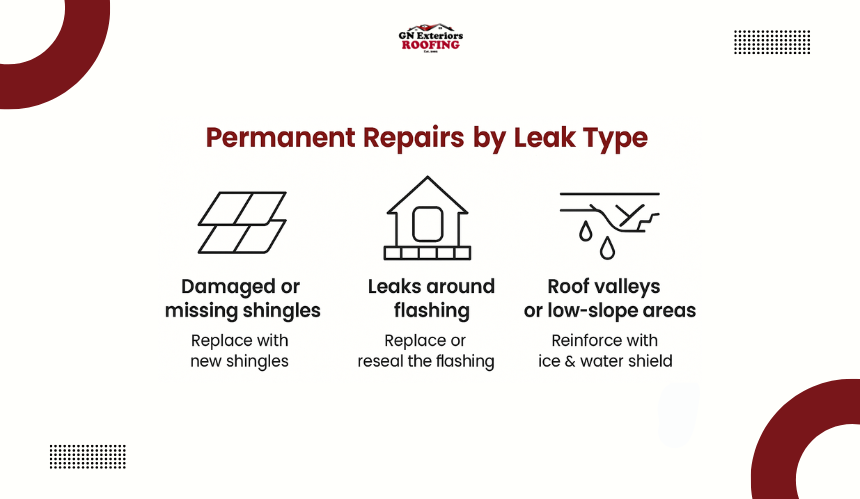
If the leak stems from cracked or missing shingles:
Pro Tip: Match the new shingle type (asphalt, architectural, etc.) and color to maintain uniformity and warranty coverage.
For leaks around chimneys, vent pipes, or skylights:
If a vent pipe boot is cracked, replace it entirely with a new rubber boot and seal it tightly around the pipe.
If the leak is in a roof valley or flat section:
If the leak has caused long-term water intrusion:
Important: Never install new shingles over rotten wood. This traps moisture and accelerates failure.
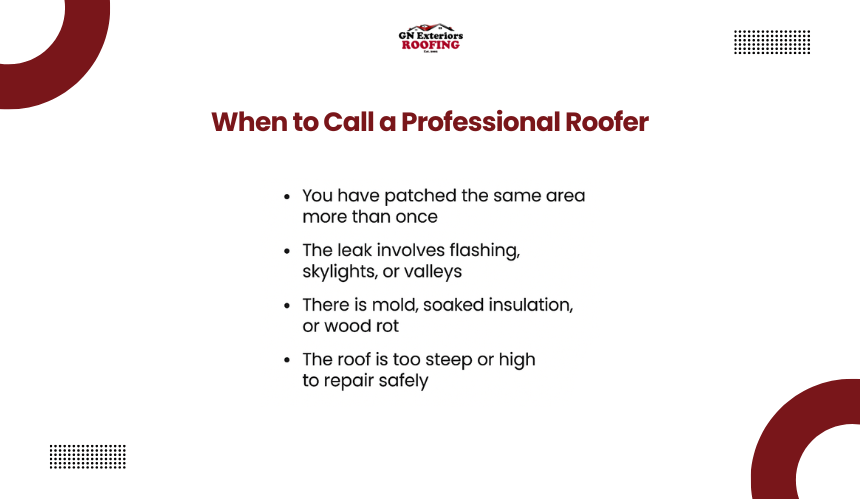
You should call a professional roofer when the leak source is unclear, the damage involves structural elements like roof decking or flashing, or if the leak has caused mold, insulation damage, or recurring ceiling stains.
Some repairs require more than DIY tools; they demand experience, precision, and safety equipment.
Here are the signs it’s time to get an expert involved:
At this point, it’s not just about stopping a drip; it’s about protecting the structure of your home, your energy efficiency, and your peace of mind. That’s where professional support makes all the difference.
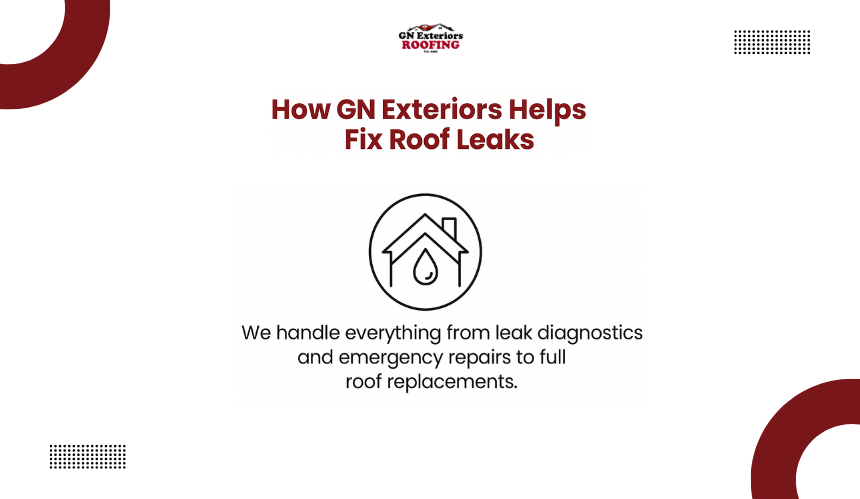
If you’re dealing with a persistent roof leak or want a thorough inspection to make sure it’s truly resolved, the roofing specialists at GN Exteriors are here to help. Our team handles everything from leak diagnostics and emergency repairs to full roof replacements, always with safety, accuracy, and long-term durability in mind.
The time to repair a roof leak depends on the severity and type of damage. Minor shingle replacements or sealant fixes can take a few hours, while extensive repairs involving flashing replacement or decking repairs may require several days. Weather and roof accessibility also impact repair timelines.
Yes. Water from roof leaks can infiltrate the attic or the ceiling electrical wiring, increasing the risk of short circuits, electrical faults, or even fire hazards. It’s critical to inspect and address any electrical components near leak sites during repairs.
Typically, sudden and accidental leaks caused by storm damage or accidents are covered by most homeowner insurance policies. However, leaks resulting from poor maintenance or gradual wear and tear are often excluded. Always review your policy terms and document damage promptly.
Improving attic ventilation helps regulate temperature and moisture levels, reducing ice dam formation and condensation that can cause leaks. While ventilation alone won’t stop all leaks, it’s a crucial component of a comprehensive roof maintenance strategy.
Walking on a roof can be dangerous, especially if the slope is steep or the shingles are brittle. If you must inspect your roof, use proper safety gear, avoid wet or icy conditions, and consider hiring a professional roofer for a thorough and safe assessment.
