
Hailstorms can be incredibly destructive to your home’s roof, often causing significant damage that can be hard to detect at first glance. Inspecting your roof after a hailstorm is a critical first step in maintaining your home’s integrity. Hail damage isn’t always visible right away, and even small issues can escalate if left unchecked.
In this guide, we’ll walk you through how to inspect your roof post-storm, identify common damage types, and take steps to file insurance claims.

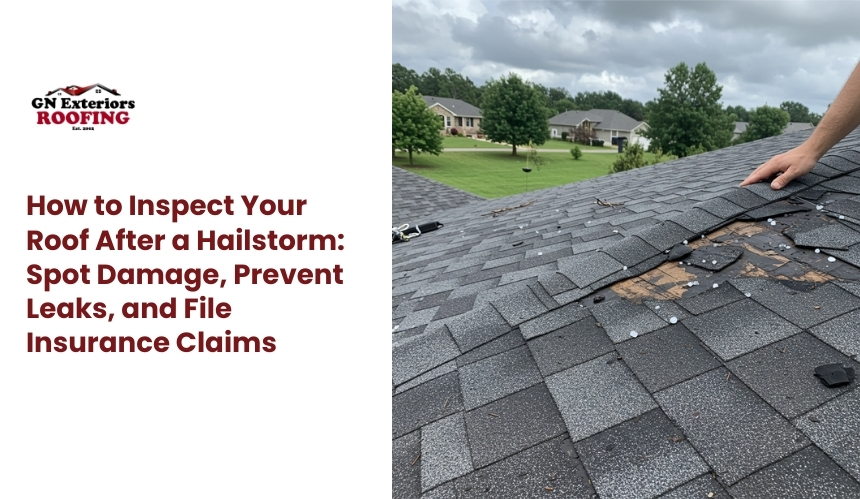
Hailstorms can cause a range of roof issues, from minor cosmetic damage to serious structural problems. Identifying these problems early can prevent costly repairs and help protect your home from further damage.
While some issues are immediately visible, others may only become apparent after a more thorough inspection. Below are the key signs of hail damage:
By understanding these signs, you can more effectively assess whether your roof has sustained hail damage and take timely action before the damage worsens.

Following a hailstorm, it’s crucial to thoroughly assess your roof to detect any potential damage before it worsens. However, roof inspections can be hazardous, so it’s important to follow safety protocols and take the necessary precautions to ensure your safety while inspecting the roof.
Here’s a step-by-step guide on how to safely inspect your roof for hail damage:
By following these steps, you ensure that your roof inspection is thorough, safe, and effective, allowing you to catch damage early and prevent long-term issues.

After a hailstorm, it’s critical to take immediate action to minimize the risk of leaks and avoid long-term damage. Even if you’ve identified hail damage, quick intervention can prevent further issues like water infiltration, mold growth, or structural deterioration. Below are proactive measures you can take to safeguard your home until professional repairs are made.
If your roof has sustained visible damage, particularly missing shingles or punctures, covering the affected areas with a tarp can protect your home from water intrusion.
Secure the tarp tightly over the damaged sections of the roof, ensuring that the edges are weighed down or anchored to avoid being blown away by the wind.
This temporary measure will help shield your interior from rain or snow until permanent repairs are completed.
After a hailstorm, your roof’s vents and flashing are often the most vulnerable areas, and even minor damage to these components can lead to leaks over time. To prevent water from seeping in, it’s essential to reinforce or repair these areas promptly.
If you spot any dents, cracks, or displacements in the flashing or vents, it’s critical to seal gaps immediately with weatherproofing materials or patch the affected areas temporarily with tape or roofing tar.
For a longer-term solution, consider hiring a siding professional to replace damaged flashing or vents to ensure that they are properly sealed and functioning.
Clogged gutters and downspouts can exacerbate roof damage after a storm by causing water to overflow and pool around the base of your house. To avoid leaks in the attic or foundation, make sure your gutters are clear of debris, fallen branches, and leaves.
A blocked gutter can cause water to back up onto the roof, accelerating the degradation of roofing materials. Regular maintenance of gutters and downspouts, especially after a hailstorm, is essential in directing water away from the roof and foundation.
While you can perform an initial inspection yourself, only a professional roofer can spot hidden damage. A professional inspection ensures that even the most subtle hail damage, such as minor cracks in flashing or small dents in shingles, is properly assessed.
At GN Exteriors, our experts are trained to detect even the most subtle hail damage, from cracks in flashing to small dents in shingles. Schedule your free estimate today to ensure your roof is properly assessed and protected from future leaks and long-term water damage.

Filing an insurance claim after a hailstorm can seem overwhelming, but understanding the process can make it much smoother.
Timely filing ensures that you receive the compensation you need for repairs while minimizing the financial impact on you. Below is a step-by-step guide to help you navigate the process.
Before taking any action, start by reviewing your homeowner’s insurance policy. Understand what is covered under hailstorm damage, as roof repairs are typically included. However, the specifics of coverage can vary, including deductibles, limits, and exclusions.
Be sure to check if there are any conditions that might affect your claim, such as coverage for specific materials or proof of regular maintenance.
After reviewing your policy, immediately contact your insurance provider to report the hail damage. Provide them with essential details, such as the date of the storm, a description of the damage, and any temporary repairs you may have made to prevent further damage.
Your insurance provider will send an adjuster to assess the damage. It’s important to be present during this inspection. Point out areas of damage that may not be immediately visible, such as hidden leaks or structural issues.
Share the documentation you’ve gathered during your roof inspection, as it will help the adjuster better understand the extent of the damage and speed up the claims process.
After the adjuster’s inspection, reach out to professional roofing contractors to get repair estimates. You should get quotes from several contractors to ensure you’re receiving a fair price. These estimates will be used by the insurance company to determine how much they will cover for repairs.
Once the insurance company has processed your claim, it will issue a settlement offer. Review the offer carefully, paying close attention to the payout amount, deductible, and any exclusions. If the offer seems too low or if there are discrepancies, don’t hesitate to dispute it. You can request a re-evaluation if necessary.
Once you have received your settlement, it’s time to proceed with roof repairs. If immediate repairs can’t be done, take temporary steps to prevent further damage, such as covering the roof with a tarp.
Once the final settlement is approved, hire a trusted roofing contractor to complete the necessary repairs. Make sure to keep all receipts and repair documentation for your records in case of future claims or issues.
By following these steps, you can ensure that the insurance claim process goes smoothly and that your roof is repaired efficiently, bringing it back to its pre-storm condition.
Yes, hail damage can impact the energy efficiency of your home. Damaged shingles or tiles can create gaps in your roof, allowing air to escape and letting moisture seep in. This can lead to increased energy bills and humidity issues in your attic, potentially causing mold growth.
If your roof has sustained significant hail damage, such as numerous missing or cracked shingles, granule loss, or punctured decking, replacement may be necessary. On the other hand, if the damage is limited to minor cracks or dents, repairs may suffice.
While it’s tempting to perform roof repairs yourself, it’s safer and more effective to hire a professional, especially if hail damage is extensive. Roofers have the expertise and equipment to perform repairs correctly, ensuring the roof is restored to its full functionality. DIY repairs can lead to further damage or void warranties.
The timeline for repairing hail damage depends on the severity of the damage and the availability of materials and contractors. Typically, smaller repairs can take a few days, while full roof replacements might take longer, from several days to a couple of weeks.
Hail damage typically does not void your roof’s warranty, as long as the damage is reported in a timely manner and repairs are done by certified professionals. However, some warranties may have specific conditions regarding hail damage. It’s important to review your warranty documents or consult with the manufacturer to understand any implications.
Yes, hail impacts different roofing materials in varying ways. Asphalt shingles can suffer from granule loss, cracking, and bruising, while metal roofs may experience dents or dings. Metal roofs are often more resistant to hail damage but may still require repairs depending on the size and frequency of the hailstones. A professional inspection will help determine the level of damage specific to the material.
